Luma x21/x20 NVR local interface
Most common functions can be handled via OvrC. All functions can be handled with the web UI. However, if you cannot use either of these, your NVR comes with a mouse so you can use the local UI.
As the system boots up, icons for each HDD display at the top of the screen. This serves as a spot check of your system health.
When the NVR powers up, the setup wizard launches. You can skip it if desired, or disable it if needed.
Click anywhere on the screen to log in to the system. The system automatically logs you out after one minute of inactivity.
When you log in, the system opens to the live view page.
Layout of the home page
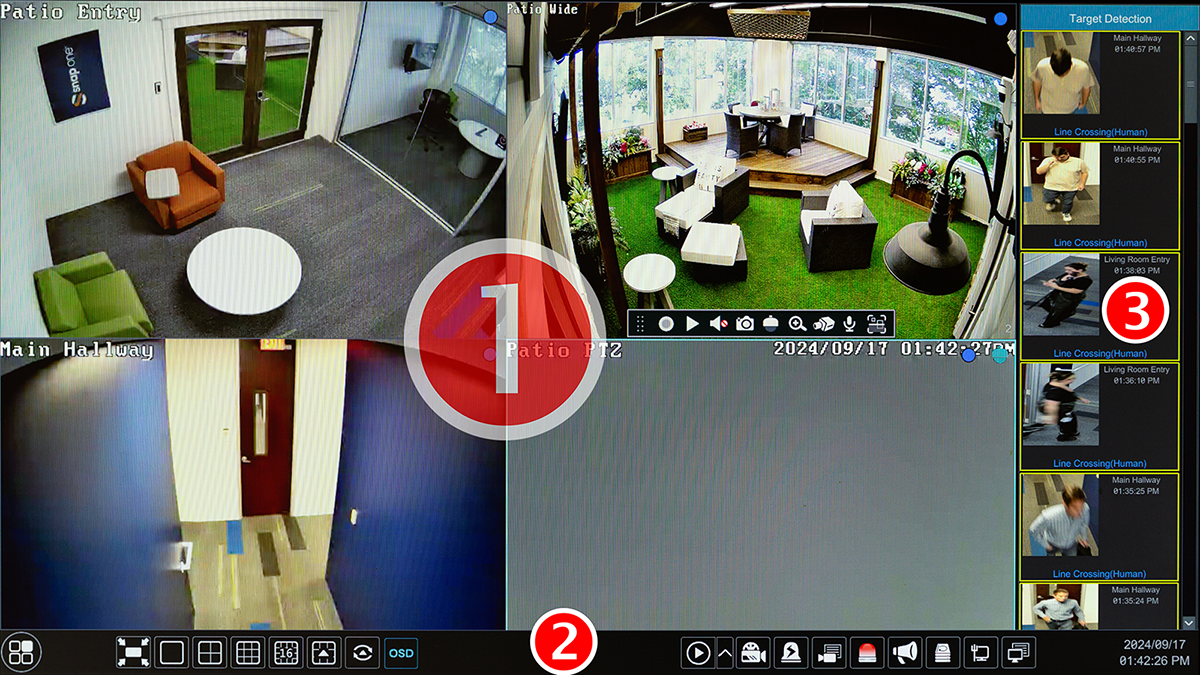
- (1) Channels section
- (2) Bottom toolbar
- (3) Sidebar panels
(1) Channels section
This section shows a grid view of your system.
If a channel is empty, click the + icon in the center to add a camera to that channel.
Double-click on a channel to view it in single-channel mode; double-click again to return to the previous view.
In-channel iconography
The top right of each channel may display several icons.
-
A colored dot indicates recording is active. The color indicates what type of event caused the recording.
-
A speaker indicates the NVR is playing audio input from this camera's microphone.
-
A microphone shows your system microphone is being broadcast to this camera's speaker.
-
A PTZ profile indicates that this camera is a PTZ.
Event classification iconography
-
 AI detected an event.
 -
 Area intrusion
 -
 Line crossing
 -
 Manual record
 -
 Basic motion
 -
 Ordinary recording
 -
 Other recording
 -
 POS recording
 -
 Scheduled recording
 -
 Sensor recording
Floating channel menu
Click on a channel to reveal a control menu for that camera. It appears either just above or just below the channel.
-
Grip: This lets you move the menu to a more suitable position.
-
Record: Starts or stops manual recording. While recording is active, this center of this icon turns red.
-
Instant Playback: This immediately launches the most recent recording from this channel. Tools include a scrub bar, play/pause buttons, audio toggle, and snapshots.
-
Mute: Toggles the sound for the channel. When active, you can hear audio picked up by the camera's microphone (if any).
-
Snapshot: Takes a snapshot of the channel. This opens a dialog where you can export the image or save it to your NVR.
-
PTZ control: Click to open a standard PTZ control dialog. This is disabled for non-PTZ cameras.
-
Zoom In: Switches to single-channel mode so you can see additional detail (up to the camera's resolution). Click (or click and drag) in the thumbnail in the lower right of the screen to select an area to investigate. Click the zoom in and zoom out icons as needed. Use the dropdown to switch to a different camera. Click Back to return to the live view.
-
Image Adjustment: This option opens the Image Adjustment controls as provided under the Settings menu. This panel does not scroll; instead, use the three dots at the bottom to navigate pages.
-
Start Talk: Use your local microphone to communicate through the camera. This is disabled if your camera does not have an associated speaker.
-
Target Detection: This shows a version of the Target Detection sidebar. WHile it only shows events for the selected camera, you can use the dropdown to select a different camera.
Popup channel menu
Right-click on a channel to open a pop-up menu.
-
Manually record on/off: While manual recording is active, a green dot appears on the channel.
-
Instant Playback: Select how long ago you want to start playback. Select Customization to choose any playback time and date.
-
Enable Audio: Toggles the sound for the channel. When active, you can hear audio picked up by the camera's microphone (if any).
-
Original Proportions / Overspread Window: Select whether the camera image stretches to fill the channel window or shrinks to fit .
-
Snapshot: Takes a snapshot of the channel. This opens a dialog where you can export the image over the network or save it to your NVR.
-
PTZ control: Click to open a standard PTZ control dialog. This is disabled for non-PTZ cameras.
-
Zoom In: Switches to single-channel mode so you can see additional detail (up to the camera's resolution). Click (or click and drag) in the thumbnail in the lower right of the screen to select an area to investigate. Click the zoom in and zoom out icons as needed. Use the dropdown to switch to a different camera. Click Back to return to the live view.
-
Target Detection: This shows a version of the Target Detection sidebar. While it only shows events for the selected camera, you can use the dropdown to select a different camera.
-
Camera Info: Gives a variety of technical data for the camera.
(2) Bottom toolbar
Below the channels are three separate sets of tools.
Left menu button

In the lower left is a button that opens a small menu. The top of this menu shows which credentials you are using.
-
Intelligent Analytics: Opens this window where you can review AI-triggered events.
-
Search and Backup: Opens this window, where you can search for older archives.
-
Playback: This opens the playback window to review video files.
-
Settings: Takes you to the settings window, the hub for control and customization.
-
Login/Logout: Allows (or blocks) activities other than channel observation.
-
Shutdown: Give you the following options:
-
Logout
-
Reboot
-
Shutdown: This requires an admin password to authorize. Once processing has been safely terminated, you must flip the NVR's switch to off.
-
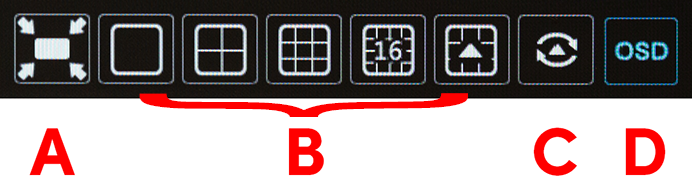
Display tools
-
Fullscreen: Fills the screen with the camera feed(s). To access the bottom toolbar, move the mouse to the bottom of the screen. To access the sidebar, move the mouse to the right side of the screen.
-
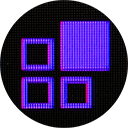
Multichannel Display Buttons: Use these to select a single channel, 3×3 grid, or other multi-channel modes.
-
Dwell: Select how long the system waits before switching channels (5 seconds to 1 minute) in sequence mode.
-
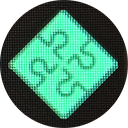
Display/Hide OSD This affects the iconography that shows in the upper right of all channels.
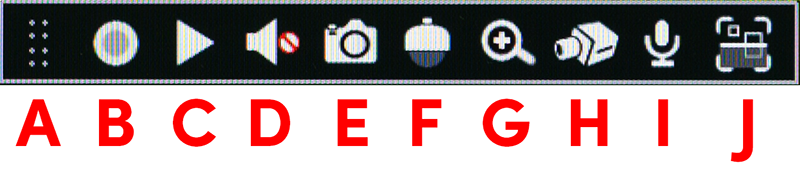
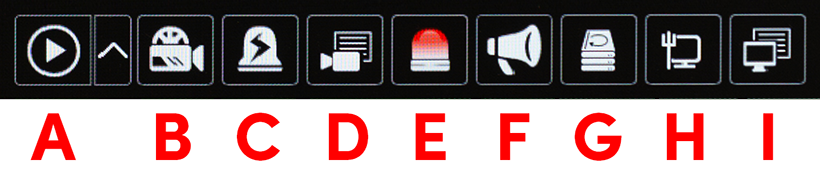
Playback tools
-
Playback: Click the play button to open the playback window. Click the up arrow to load the window with a specific amount of rewind.
-
Start/Stop Recording for the active channel.
-
Manual Alarm: Here you trigger alarms attached to your system.
-
Record Status: Displays the information found in the record tab of the Status Window as a pop-up.
-
Alarm Status: Displays the information found in the alarm tab of the Status Window as a pop-up.
-
Open Broadcast: Select one or more capable cameras, and add them to the list. As long as the window stays open, you can speak through those cameras' attached speakers.
-
Disk Status: Displays the information found in the disk tab of the Status Window as a pop-up.
-
Network Status: Displays the information found in the network tab of the Status Window as a pop-up.
-
Information: Opens the complete Status Window with all of its pages.
(3) Sidebar panels
Click on the carat to the right of the sidebar name to switch between sidebar options.
Camera
This lists all cameras on the system. Click on a channel in the camera area and then click on a camera to assign that camera to the selected channel. You can also drag and drop from the list into the channels. Can also re-sort.
Single Channel Sequences
Here you set up sequences for the live page.
Create the + button to create a group. Give it a name, set the time for it to dwell on each camera, and select the cameras to use.
Click on an existing group, then click Edit to change the name or dwell, or click the trashcan icon to delete it.
To activate a channel sequence, set the live view to single-channel mode and double-click the sequence name.
Customize Display Modes
Here you create display modes, or switch between them.
-
To create a mode, click the Add button. Name the mode, and the system saves it for you.
-
Change to a different saved mode by clicking on its name.
-
To edit a mode's appearance, make the changes to the display, and click the Save icon.
-
To change a mode's name, load it by clicking on its name, then click the Edit Name icon.
Target Detection (420/820 only)
This panel shows a snapshots of all events captured by all cameras. If you select Real Time at the bottom, it adds new events as they occur. If you select History, the NVR shows the event list as of the moment you switched; new events are not added to the list, which makes it easier to browse in a busy environment.